
Replacement Window Grilles: A Georgia Homeowner’s Guide to Styles and Cleaning

Choose the details you will see every day

You like the divided-window look from the street, but you also want a clear view from your favorite chair. When choosing replacement windows, the grille pattern deserves a separate decision from the frame color or operating style.

For homeowners in Georgia, a useful approach is to compare the appearance from both sides of the glass, understand how the grilles are built, and put the final choices on a drawing before ordering. This guide helps you organize that conversation without assuming every window needs the same design.

1. Separate the pattern from the construction

Window grilles are the decorative bars that create a divided-glass appearance. You may also hear them called grids. Two windows can have a similar pattern while using different grille systems.

Andersen’s guide to window grilles explains the distinction between modern decorative grilles and historic true divided-light windows, which use individual panes held by dividers. Do not assume every rectangle you see is a separate piece of glass.

Ask two questions at the sample display: “What pattern am I looking at?” and “Where are the bars located?” Keep the answers separate in your notes. The first describes the design; the second helps explain the surface you will see and clean.

2. Compare the main grille systems

Grilles between the glass

These bars sit inside the insulated glass assembly rather than on its exposed surfaces. Pella’s wood-window grille guide describes its sealed between-the-glass options as leaving smooth glass surfaces for cleaning. Product lines can differ in available colors and configurations.

If simpler glass cleaning is a priority, ask to see this option beside a surface-applied grille. Compare the appearance close up as well as from across the room. Confirm whether the proposed window also includes an exterior grille; some systems combine features.

Surface-applied grilles

These add bars to one or both faces of the glass. Manufacturer terminology varies, so ask for a cross-section or labeled sample rather than relying only on an abbreviation.

For example, Andersen’s grille-style reference describes its simulated divided-light system as having exterior grilles and fixed or removable interior grilles. Its full divided-light system also includes a spacer between the panes. Those descriptions apply to the manufacturer’s systems, not automatically to every brand.

Ask which pieces are permanent and how to clean around them. Do not plan to pry off a surface bar to clean the glass.

Removable interior grilles

Some products offer room-side grilles designed to detach for cleaning. Andersen’s reference identifies clips or fasteners for its removable interior options. Ask for the instructions and a demonstration for the actual model; “removable” should be confirmed rather than guessed.

For ongoing care beyond the grilles, keep our replacement window maintenance checklist with your product manuals.

3. Review patterns on your own window layout

A pattern in a small brochure drawing can look different on a tall bedroom window or a wide living-room combination. Ask for a drawing that shows the actual proportions of each opening.

Andersen describes colonial patterns as symmetrical grids and prairie-style patterns as lines arranged near the perimeter. Other options place divisions only in the upper portion. A grille-free design is also worth including in your comparison if an uninterrupted view is a priority.

Start with two or three alternatives instead of comparing every catalog option. Look at each from the sidewalk and from the place where you normally sit. Pay attention to where the horizontal lines cross your view.

  • Front of the home: Compare the pattern with neighboring windows, the entry door, and existing trim.
  • Living room: Check the view from the sofa, not only while standing beside the glass.
  • Kitchen: Consider what the pattern looks like from the sink or dining area.
  • Windows staying in place: Include them in the drawing so the old and new details can be compared together.

For a double-hung window, ask the proposal to show the upper and lower sash separately. Our window-style guide can help you separate this decorative choice from how the window opens.

4. Confirm width, profile, and color

A pattern name does not describe the entire look. Ask for the grille width, its flat or contoured profile, and the finish visible from each side. Compare physical samples where available instead of relying on a phone screen alone.

Pella’s guide illustrates different profiles and patterns within its wood-window offering. Use that as a reminder to ask what is available for the exact product in your quote, rather than assuming an option shown on one series transfers to another.

Consider a simple example: you want divided glass on the front bedrooms but prefer an open view in the rear living room. Label those choices by room and position on the drawing. A blanket note such as “white windows with grids” would leave too much undecided.

5. Put the final choices in writing before ordering

Some grille choices are built into the window. Andersen states that its Finelight between-the-glass and full divided-light options must be ordered with the unit and cannot be added afterward. Check the rules for your selected product before treating grilles as a decision to postpone.

Review one line for each opening:

  • Room and window position
  • Grilles or no grilles
  • Pattern drawing for each sash or fixed section
  • Between-the-glass, surface-applied, removable, or combined construction
  • Bar width, profile, and interior and exterior colors
  • Product-specific cleaning instructions

Keep this list with the approved proposal. Our replacement window quote checklist covers the broader product and installation details to compare alongside it.

The best discussion ends with a drawing you understand and specifications that match it. You should be able to point to each window and explain what you chose, what it will look like, and how you will care for it.

This guide provides general product-selection information. Grille options and care requirements vary by manufacturer, product line, and window configuration. Confirm availability and final specifications before ordering.
How to Care for Replacement Windows: A Georgia Homeowner’s Checklist

Build a practical care routine for your new windows

Your replacement windows are installed, and the next question is simple: how should you look after them? Start with the instructions for your exact product, then make a short list of cleaning and inspection tasks you can repeat.

For homeowners in Georgia, that means considering the conditions around each opening, from a dusty driveway to leaves collecting near a sill. This checklist helps you organize routine care and recognize when to ask for service instead of attempting a repair.

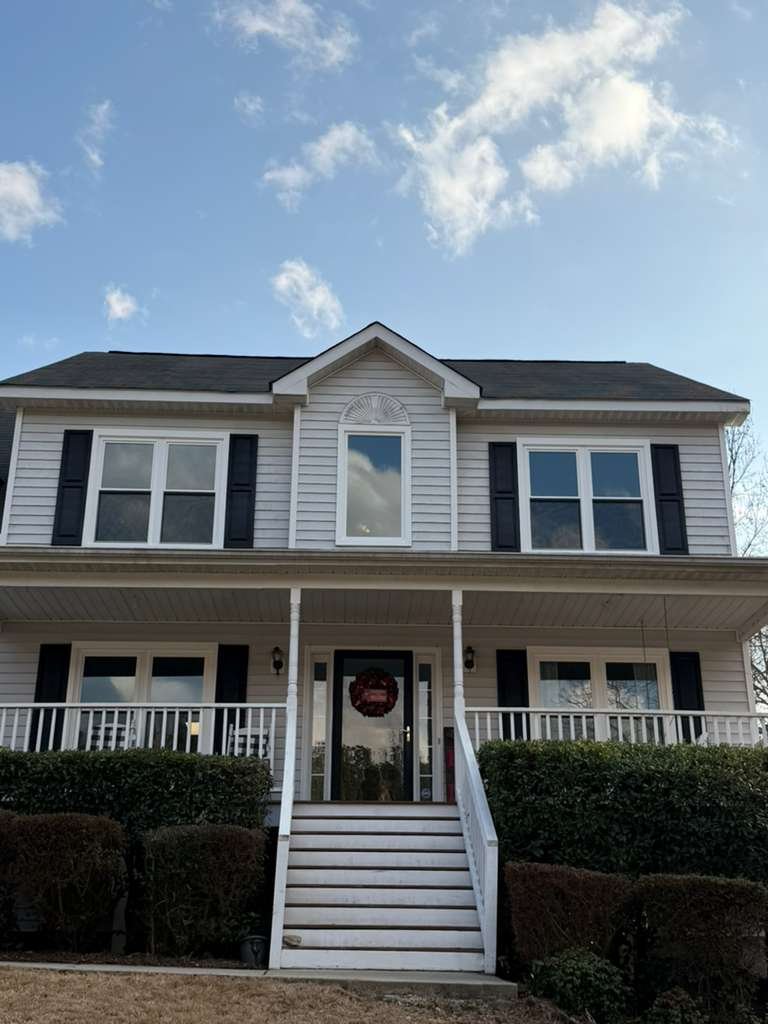
White-framed windows and dark shutters on a two-story home with a covered front porch.
A home from the MR Premium Windows project library. Plan safe cleaning access for every window, including upstairs openings.

1. Keep the right instructions with your project records

Save the manufacturer, product line, installation date, care manual, and warranty documents together. Photograph product identification labels before removing any temporary paperwork, and ask which labels should remain on the unit.

Do not assume that one cleaning method works for every window. Andersen’s cleaning guidance, for example, gives different instructions for its HeatLock glass because of the interior coating. That is a useful reason to identify the glass before choosing a cleaner, even when two windows look alike.

If your installation is approaching, add the care manual and an operation demonstration to the handover discussion in our window installation preparation checklist.

2. Clean the glass without aggressive tools

Use the cleaner, cloth, and method approved for your window. Andersen advises cleaning away from direct sun to reduce streaking and premature drying. For stubborn residue, ask for product-specific instructions rather than moving to a stronger chemical or scraper.

The Fenestration and Glazing Industry Alliance’s care guide warns against razor blades, abrasive pads, and pressure washers, which can damage glass or window components. A pressure washer is not a shortcut for cleaning a hard-to-reach upper window.

Only work where you have safe access. Do not lean outside to reach the glass. If your model has tilt-in or other cleaning features, ask for a demonstration and follow its manual; do not improvise a sash-removal procedure.

3. Keep tracks and drainage openings clear

FGIA recommends removing dirt from sill and track areas and keeping drainage pathways, often called weep holes, free of debris. These openings help accumulated water drain outside. Do not fill them with caulk or paint because they look like unfinished gaps.

Ask the installer to show you the drainage features on your model and explain the approved cleaning method. Do not dismantle covers or push sharp tools into an unfamiliar opening.

For example, if you find leaves near a lower window, note the location and clear accessible loose debris as the manual allows. If water remains where it should drain, or appears inside the room, photograph it and request an assessment. A blocked opening should not be assumed to explain every leak.

4. Check operation and visible seals

During routine use, notice whether each operable window opens, closes, and locks normally. Infinity by Marvin’s maintenance guidance includes checking hardware operation, examining finishes and weatherstripping, and cleaning dirt from moving-part areas.

Look for loose or damaged weatherstripping without pulling it out. If a sash sticks, will not stay in position, or will not lock, stop forcing it and contact the installer or manufacturer. Describe the symptom and the exact window rather than trying to adjust unfamiliar hardware.

Lubrication is product-specific. FGIA advises following the manufacturer’s maintenance instructions for moving parts. Avoid spraying a general-purpose oil into every track, seal, or drainage opening.

5. Include screens and frame finishes

Use your manual to remove screens safely, without bending the frames. Marvin’s care instructions describe laying screens on a clean, flat surface, removing dust gently, and letting them dry fully before reinstalling. Follow the instructions for your own screen material and design.

Check the frame finish as well as the glass. Marvin calls for inspecting exterior wood finishes for deterioration. Vinyl, fiberglass, and clad surfaces have their own cleaning and refinishing rules; do not apply a wood-care procedure to another material. Our replacement window frame-material guide explains the differences to discuss.

If you notice cracked finishes, damaged seals, or wet trim, take dated photos and ask what maintenance or repair is appropriate before painting or adding sealant.

Keep one simple care and service log

Use the inspection frequency in your manufacturer’s manual. A calendar reminder is useful, but the schedule should reflect the actual product and exposure rather than a universal rule for every Georgia home.

  • Window location: Room and position, such as “front bedroom, left.”
  • Date and task: Cleaning, screen care, or a visible-condition check.
  • Observation: Describe what changed without guessing the cause.
  • Follow-up: Record whom you contacted and the instructions received.

Keep normal cleaning separate from a service concern. If fogging persists or you see moisture near the opening, our window condensation guide can help you describe where it appears. Share those observations with the professional assessing the window.

This guide provides general care information. Follow the instructions and warranty terms for your specific windows. Difficult access, damaged glass, unsafe operation, and recurring leaks require appropriate professional help.

Can Replacement Windows Reduce Outside Noise? A Georgia Homeowner’s Guide

Compare replacement windows with outside noise in mind

Traffic interrupts a conversation in the living room, or passing trucks are especially noticeable in a front bedroom. If outside noise is part of your reason for considering replacement windows, bring that concern into the product discussion before choosing a glass package.

For homeowners in Georgia, a useful starting point is to describe the sound, identify the rooms affected, and request acoustic information for the exact window being proposed. The goal is a realistic improvement, not a promise of silence.

1. Describe the noise before comparing windows

Keep a short observation list for the rooms that matter most. Note the source, when it occurs, and what you are doing when it becomes distracting. “Trucks passing the front bedroom before breakfast” is more useful than “the house is noisy.”

  • Room: Identify the window by location, not just its size.
  • Sound: Describe traffic rumble, voices, barking, or another recurring source.
  • Timing: Note whether the concern happens throughout the day or during a specific activity.
  • Window condition: Record whether it closes and locks normally, and whether you notice drafts or visible damage.

Share the list during the assessment. Do not force a sticking sash or remove parts to investigate. If the windows also have operating or moisture problems, our guide to when to replace your windows can help organize those concerns separately.

2. Ask what STC and OITC mean for your concern

Two common acoustic ratings are Sound Transmission Class (STC) and Outdoor-Indoor Transmission Class (OITC). The Port of Seattle’s window sound-control guidance explains that higher numbers indicate greater sound reduction within each rating system. Compare STC with STC and OITC with OITC, rather than treating the two scales as interchangeable.

Andersen’s sound-abatement guide distinguishes STC, commonly associated with sounds such as speech, from OITC, which addresses outdoor-to-indoor sources such as traffic and aircraft. If road noise is the problem, ask for OITC information as well as any STC figure.

Ask the supplier to identify the product and test configuration behind each number. A rating without a matching specification is not enough to compare two proposals. If acoustic data are unavailable, have that recorded instead of accepting a general “quiet glass” description.

3. Compare glass construction, not just pane count

Andersen explains that glass thickness, spacing, and construction affect sound performance. Laminated glass and combinations of different pane thicknesses are options to discuss. Adding a third pane does not, by itself, establish that a window is the better acoustic choice.

Request a written description of the proposed glass package and its supporting acoustic data. Ask whether the available option applies to the window style and dimensions you need. Do not assume every product from one manufacturer offers the same configuration.

For example, two proposals might both say “double-pane,” while only one identifies an acoustic glass option and supplies a rating. Ask the other supplier for comparable documentation before deciding whether the products address the same goal.

4. Include the installation and surrounding room

The window is only one part of the exterior of a room. The Federal Highway Administration’s building-noise guidance explains that walls, doors, ventilation openings, and interior sound absorption also affect the reduction of outdoor noise. A window rating alone cannot predict the finished room’s sound level.

Pella’s sound-resistance guidance also identifies proper installation and airtight seals as important. Ask how the installer will assess the existing opening and follow the selected product’s sealing and installation instructions.

Keep required ventilation and drainage in mind. Do not block vents or window drainage openings as a noise-control shortcut. If the sound is severe or the expected improvement is central to your decision, ask whether a qualified acoustical assessment would help before committing to a project.

5. Keep energy performance and daily use on the checklist

Ask for acoustic data alongside the product’s energy ratings, rather than accepting one as a substitute for the other. Our guide to U-factor, SHGC, and Low-E glass covers the thermal and daylight information to review for your Georgia location.

Try the proposed operating hardware and discuss cleaning access. If you normally open the bedroom window, explain that habit before selecting a solution. Have the installer confirm that the proposed configuration preserves the applicable ventilation and safety requirements for the room.

Replacement is not the only question worth asking. ENERGY STAR notes that storm windows can reduce outside noise. Where an existing window is suitable to retain, ask whether a compatible secondary window is worth evaluating, including its effects on access, cleaning, appearance, and operation.

Bring these questions to the proposal review

  • Which room and noise source is this recommendation intended to address?
  • What exact window, operating style, and glass package are included?
  • Which STC and OITC data support the recommendation, and what was tested?
  • What work around the opening is included in the installation?
  • What other sound paths could limit the result?
  • What improvement can be reasonably discussed, and what remains uncertain?

Keep the answers with your room-by-room notes and use our replacement window quote checklist to compare the full scope. A useful proposal connects a documented product choice to your actual concern, without promising that every outside sound will disappear.

This guide provides general planning information, not a site-specific acoustic assessment. Results depend on the existing building, selected window configuration, installation, and noise source. Product suitability and availability must be confirmed for your home.

Vinyl, Fiberglass or Wood Replacement Windows: A Georgia Homeowner’s Guide

Compare frame materials before choosing replacement windows

You like the look of a wood interior, but you would rather avoid repainting exterior frames. Another proposal lists vinyl, while a third mentions fiberglass. For homeowners in Georgia, those labels are a starting point, not enough information to choose the right replacement window.

Compare what each product is made of, the care it needs, and how it will look in your home. Then check the performance ratings for the actual window and glass package. No single material answers all of those questions.

Start with the frame, sash, and exterior surface

The frame surrounds the window, while the sash holds the glass. Ask the supplier to identify the materials used in each, including the surfaces you will see indoors and outdoors.

A clad-wood window combines wood with a protective exterior covering. That is different from a window whose frame is made throughout from the exterior material. Marvin’s wood-window guide, for example, distinguishes wood interiors paired with wood, aluminum-clad, or fiberglass exteriors.

Ask to see a labeled product cross-section or materials specification. If a proposal says only “composite” or “fiberglass exterior,” have the supplier explain the complete construction rather than assuming it matches another product with a similar label.

Vinyl windows: Consider the finish and care requirements

Vinyl frames are typically made from PVC. The U.S. Department of Energy’s guide to window types (PDF) describes vinyl frames as moisture resistant and not requiring painting. That can make them worth considering if routine frame painting is something you want to avoid.

Before choosing, look at an actual sample of the interior and exterior finish. Confirm which colors are available for the specific product, and ask for the manufacturer’s rules before planning any future repainting. Also compare the frame profile beside your existing trim.

No painting requirement does not mean no maintenance. Keep the care instructions for the glass, hardware, tracks, and weatherstripping with your product records.

Fiberglass windows: Review the complete product

DOE describes fiberglass frames as dimensionally stable, with cavities that can be filled with insulation. Those characteristics are useful background, but they do not establish that every fiberglass window outperforms every vinyl or wood window.

Ask whether the quoted window has fiberglass inside and outside or combines it with another material. Review the available finishes, frame dimensions, operating hardware, and care instructions. If a salesperson recommends it for a particular opening, ask what product-specific evidence supports that recommendation.

Wood and clad-wood windows: Plan for both sides

Wood can be a good candidate when the interior appearance is a priority. Bring a photo or sample of nearby trim and compare the proposed wood species, grain, and finish in the room where the window will be installed.

DOE notes that wood frames require regular maintenance and that exterior aluminum or vinyl cladding reduces those maintenance needs. Ask which surfaces remain exposed wood and what care the exterior covering requires.

If any wood arrives unfinished or only primed, clarify who will finish it and when, following the manufacturer’s instructions. A proposal that includes factory-finished interiors is different from one that leaves finishing for you to arrange.

Check performance for your Georgia location

Compare the complete window, not just the frame material. The NFRC window ratings guide explains whole-product ratings, including U-factor for heat transfer and solar heat gain coefficient (SHGC) for incoming solar heat.

Use the ENERGY STAR Climate Zone Finder with Georgia and your county. When comparing certified products, confirm that the exact configuration qualifies for your location. Our guide to U-factor, SHGC, and Low-E glass explains what to request.

Keep the installation discussion separate. A material choice does not decide whether the existing frame can stay. Our insert versus full-frame replacement guide covers that assessment.

Make “low maintenance” specific

Ask to read the care manual before ordering. As one manufacturer example, Marvin’s maintenance guidance includes checking finishes and weatherstripping and cleaning dirt from sills, tracks, and hinges. Follow the instructions for your selected product rather than applying another brand’s cleaning or repair procedure.

  • Which surfaces need inspection, cleaning, or refinishing?
  • Which cleaners and tools are approved for each surface?
  • How will you safely reach exterior surfaces, especially upstairs?
  • What should you do if a finish is damaged or the window becomes difficult to operate?

If access is difficult, discuss a realistic maintenance plan before choosing. The appearance you prefer should come with care requirements you can manage.

Compare proposals with the same priorities

Imagine two proposals for the same living room: one offers vinyl inside and outside; another offers a wood interior with exterior cladding. Put the finish samples beside your trim, compare the visible frame profiles, and read both care manuals. Then compare the exact products’ energy ratings and installation scope.

Keep a short record for each option: manufacturer and product line, interior and exterior materials, finish, ratings, maintenance instructions, and included finishing work. Use our replacement window quote checklist for the rest of the proposal review.

A useful choice is one you can explain in terms of your home: the appearance you want, the care you can manage, and the documented performance of the proposed window.

This guide provides general product-selection information. Product availability, suitability, installation details, and maintenance requirements must be confirmed for your specific home and window configuration.

Window Condensation in Georgia: Does Foggy Glass Need Replacement?

Find the moisture before deciding what to replace

You notice a cloudy window over breakfast. By lunch, the glass may be clear again, or the haze may still be there after you wipe it. Those observations are useful clues when deciding whether a window in your Georgia home needs attention.

Start by locating the moisture: on the room-facing surface, on the outdoor surface, or inside a sealed glass unit. Each location points to a different conversation. Fog alone is not enough to choose a replacement project.

White-framed windows and dark shutters on a two-story home with a covered front porch.
White-framed windows on a two-story home. Photo from the MR Premium Windows project library.

1. Check which surface is wet

Take a photo before wiping the glass. If the room-facing surface is safely within reach, gently wipe a small area with a soft, dry cloth. If that clears the moisture, you have identified room-side condensation.

Check the outdoor surface only where you can reach it safely from the ground. Do not lean out of an upstairs window or climb to make this check. If you cannot identify the surface, record that uncertainty for the person inspecting the window.

  • Moisture wipes off indoors: Start with room humidity, ventilation, and the temperature of the glass.
  • Moisture is on the outside: Note the weather and whether it clears as conditions change.
  • Haze appears trapped between sealed panes: Ask for a glass-unit assessment.

This is a way to describe the problem, not a diagnosis. Mention any storm window or removable glass panel so the professional can identify which space is affected.

2. Room-side condensation: Check humidity and airflow

Indoor moisture can collect when the glass surface falls below the dew point of the room air. Even energy-efficient windows can develop condensation under some conditions. ENERGY STAR’s window guidance recommends managing humidity and allowing air to circulate over the glass.

Use kitchen and bathroom exhaust fans that vent outdoors during cooking and showers, and keep them running for about 20 minutes afterward. Check whether tightly closed window coverings restrict airflow at the glass. If you are unsure where a fan vents, have that checked rather than assuming it removes moisture outside.

A humidity meter can make the discussion more specific. The EPA’s moisture-control guide recommends keeping indoor relative humidity below 60 percent, ideally between 30 and 50 percent when possible. Those are general moisture-control targets, not a promise that every window will stay dry.

Dry wet glass and sills promptly, and address the moisture source. If condensation repeatedly returns or nearby materials remain damp, arrange an assessment rather than relying on wiping alone.

3. Outdoor condensation: Watch how it changes

Moisture can also form on the outside when humid outdoor air meets sufficiently cool glass. It may appear early in the morning and evaporate as the glass warms. Pella’s condensation guide explains how outdoor humidity, wind, and overnight conditions contribute.

Exterior droplets alone do not establish that the sealed glass unit has failed. Photograph the window at two different times and note whether the view clears. Report moisture entering the room or wet trim separately, even if outdoor dew is also present.

4. Between-pane fogging: Ask what component needs work

Persistent fogging inside a sealed double- or triple-pane glass unit is a different concern. Pella identifies seal failure as the main cause of moisture between sealed panes. A professional should confirm the location and condition before recommending work.

Ask whether the appropriate option for your model is replacing the insulated glass unit, replacing a sash, or replacing the complete window. Request an explanation tied to the frame’s condition and the availability of compatible parts. Keep the product label, installation records, and any warranty documents ready for the assessment; coverage must be checked against the actual terms.

If you are also seeing sticking, drafts, or deterioration, our guide to when to replace your windows helps you organize those additional concerns.

5. Water after rain needs its own investigation

Record whether wet trim or staining follows rainfall. Do not assume every damp area is caused by condensation. Water entering around the frame can damage surrounding wall materials, as the NFRC guide to repairing existing windows explains.

Ask the inspector to identify the water source and any damage around the opening. A proposal should explain how that problem will be addressed. Replacing glass alone does not describe a plan for repairing a leak around the frame.

Can new replacement windows still have condensation?

Yes. Pella explains that reducing air leakage can also leave more humidity inside a home. A tighter window installation may therefore make moisture management more noticeable. New windows still need appropriate ventilation and indoor humidity control.

If moisture appears after installation, contact the installer with photos showing its location and timing. Ask them to review the window, installation details, and room conditions. Avoid assuming either a product defect or a household humidity problem before those checks.

Bring a short observation log to the assessment

  • Location: Room and window position, such as “upstairs front bedroom, left window.”
  • Surface: Indoors, outdoors, apparently between panes, or uncertain.
  • Timing: Time of day, recent rain, and whether cooking or showering preceded it.
  • Pattern: One window or several; how long the moisture remains.
  • Condition: Wet sill, stained trim, damaged frame, or difficulty operating the window.
  • Records: Dated photos, humidity readings if available, and product details.

For example, “outside glass wet at 7 a.m., clear by noon, sill dry” gives a different starting point from “haze stays between panes all day.” Clear observations help the professional focus the inspection.

If replacement is recommended, ask which documented problem it will address and what work is included. Use our replacement window quote checklist to compare that scope, and our window ratings guide when reviewing the proposed products.

This guide provides general maintenance and planning information. An on-site assessment is needed to identify the moisture source and determine the appropriate repair or replacement work.

Double-Hung, Casement or Picture Windows: Choosing Styles for Your Georgia Home

Choose replacement window styles around the way you use each room

The window above a kitchen sink has a different job from the one beside a favorite reading chair. One needs to be easy to reach and open. The other may be there for daylight, a view, or both. When choosing replacement windows for a Georgia home, start with those everyday needs.

Double-hung, casement, and picture windows offer different ways to use an opening. This guide explains the practical tradeoffs and gives you a room-by-room checklist to discuss before ordering.

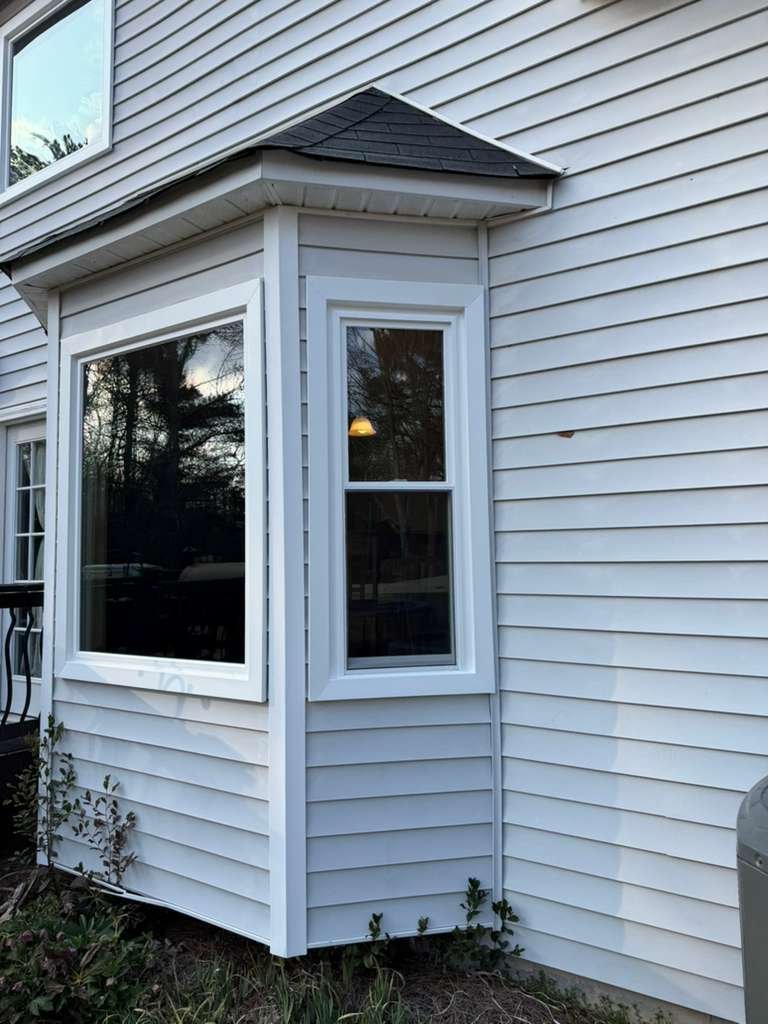
White-framed bay window with a large center pane and narrow side windows on a white-sided home.
A large central window paired with narrower side windows. Consider how each part of a window combination will be used.

1. Double-hung windows: Check reach and cleaning features

A double-hung window has two vertically sliding sashes, the framed sections that hold the glass. The lower sash moves up and the upper sash moves down. A single-hung window looks similar, but its upper sash stays fixed. The NFRC guide to window types explains these operating differences.

Double-hung windows are worth considering where you want an opening window without an outward-swinging sash beside a path or patio. Try the proposed model before choosing: can you comfortably reach the locks, lift the lower sash, and operate the upper one?

Models with tilt-in sashes can make exterior-glass cleaning accessible from indoors. Confirm which sashes tilt and ask for a demonstration of the manufacturer’s cleaning procedure. The feature should be checked for the specific product, especially for upstairs rooms.

2. Casement windows: Look inside and outside the opening

Casement windows are hinged at the side. Many residential models open outward using a crank. That operator can be useful above a kitchen sink, but check the handle’s position against your faucet, backsplash, and window coverings.

Also walk outside. An open sash needs clearance from people, furniture, and nearby obstacles. Andersen’s window-style guide highlights both the usefulness of crank operation over a sink and the potential for outward-opening windows to obstruct walkways, porches, or decks.

Ask which way each casement will open and have that direction shown on the proposal drawing. Confirm how you will clean the exterior glass; access varies by product and placement.

3. Picture windows: Plan ventilation separately

A picture window is fixed, so it does not open. It can be a good candidate when the main goal is a view or daylight. If you also want an opening window in that area, discuss a combination with operable side windows. Pella’s picture-window guide shows how fixed windows can be combined with other styles.

Review a drawing of the entire arrangement. Frame widths, grilles, and the proportions of the side windows affect what you see from your seat. Before changing an existing opening window to fixed glass, ask the installer to check the room’s ventilation and applicable safety requirements.

Include cleaning access in the decision. For a high or hard-to-reach fixed window, ask how the outside surface can be maintained safely.

Compare performance for the exact window

Once you have narrowed the operating styles, compare the proposed products and glass packages. The NFRC window ratings guide explains U-factor for heat transfer, solar heat gain coefficient (SHGC) for incoming solar heat, and visible transmittance for daylight. A style name alone does not tell you those ratings.

For your Georgia home, use the ENERGY STAR Climate Zone Finder with your state and county. Ask whether the exact configuration being quoted is certified for that location. Bring notes about direct sun, shade, and comfort concerns in each room.

Our guide to U-factor, SHGC, and Low-E glass explains the ratings in more detail.

Make a short room-by-room list

Before the assessment, write one priority and one practical constraint for each opening. For example:

  • Kitchen sink: Easy operation matters; check the handle’s reach and what sits outside.
  • Living room: Decide where you want a clear view and where you want windows that open.
  • Upstairs room: Ask to see the cleaning procedure before selecting a model.
  • Window beside a deck: Check whether an open sash would interrupt the walking route.
  • Bedroom: Have the installer confirm the opening and safety requirements before changing styles.

This is a discussion list, rather than a specification. The installer still needs to assess the opening, measurements, condition, and suitable installation method.

Confirm the details before ordering

  • Which sections open, and in what direction?
  • Can everyone who will use the window reach and operate it comfortably?
  • How will the glass be cleaned and the screen removed?
  • What will the frame, grilles, and visible glass look like?
  • Which exact product, glass package, and ratings are included?

Keep those answers with a labeled drawing of each opening. Then use our replacement window quote checklist to compare proposals with the same style and configuration. A useful choice should make sense from your room, from outside the house, and in everyday use.

This guide provides general product-selection information. Your home’s conditions, applicable requirements, and the selected manufacturer’s instructions determine the suitable window configuration and installation.

How to Compare Replacement Window Quotes: A Georgia Homeowner’s Checklist

Replacement window advice for homeowners in Georgia

Two replacement window quotes can cover the same number of openings and still describe very different projects. One may include new interior trim and exterior finishing, while another leaves those tasks for you to arrange. Before comparing the totals, check what each proposal actually includes.

Use this checklist to compare products, installation work, exclusions, and warranty terms. A clear written scope helps you ask better questions and understand why prices differ.

1. Give each contractor the same window list

Label the windows by room and location, such as “living room, front left” or “upstairs bedroom, rear.” Note which ones stick, leak, feel drafty, or have damaged frames. Ask each contractor to quote the same openings and explain any recommended changes.

Separate necessary work from optional upgrades. A different operating style, decorative grille, frame color, or additional opening can change the proposal. If you are still deciding which windows need attention, start with our guide to when to replace your windows.

2. Identify the exact window being quoted

A brand name or the phrase “energy-efficient windows” leaves important details unanswered. Ask for the manufacturer, product line, operating style, frame material, glass package, and finish. Check whether screens, hardware, and decorative options are included.

Ask for the ratings for the proposed configuration. The NFRC window ratings guide explains how standardized ratings help compare products. U-factor describes heat transfer, SHGC describes solar heat gain, and visible transmittance describes how much daylight passes through. Climate and window orientation matter when selecting a combination.

For a Georgia home, describe which rooms receive strong afternoon sun and which feel uncomfortable in cooler weather. Ask why the proposed glass package suits those rooms. Our guide to U-factor, SHGC and Low-E explains the terms without turning the quote review into a technical exercise.

3. Make the installation scope explicit

Ask whether the quote covers insert replacement, full-frame replacement, or a different approach for particular openings. Have the installer explain what stays, what is removed, and how the condition of the existing frame affects that recommendation. See our insert versus full-frame replacement guide for questions to bring to the assessment.

Then check the surrounding work:

  • Removal and disposal of the old windows
  • Work needed to manage water around the opening
  • Insulation and air sealing around the new unit
  • Interior and exterior trim, caulking, and finishing
  • Painting or touch-ups, where needed
  • Protection of nearby surfaces and final cleanup

Ask the contractor to mark each item as included, excluded, or dependent on inspection. If permits or inspections are required for your project, clarify who will arrange them and whether associated costs are included.

4. Agree on a process for hidden damage

Some conditions may become clearer only after removal begins. Ask how the contractor would handle deteriorated wood or other damage discovered around an opening. The proposal should make it easy to understand what the base price covers and what would require additional work.

A useful question is: “If you find damage, how will you show it to me, price the repair, and obtain my approval before proceeding?” Ask for that process in writing. If a quote includes an allowance, clarify its amount, what it covers, and how a difference from the actual cost would be handled.

5. Compare the full price and estimated timing

Review the total for the agreed scope, along with any taxes, delivery charges, disposal costs, and optional items. Ask how long the quote remains valid and whether any listed amount is an estimate rather than a fixed price. Compare payment schedules and the conditions attached to each payment.

The Federal Trade Commission recommends getting multiple written estimates that describe the work, materials, completion date, and price. It also advises asking about significant differences between bids rather than automatically choosing the lowest total.

Clarify the estimated product lead time separately from the installation schedule. Ask how delays or changes would be communicated. Once the scope is settled, our window installation preparation checklist can help you plan access and get rooms ready.

6. Read the warranty documents

Ask for the actual product warranty and any separate installation or workmanship warranty before deciding. Marketing terms such as “lifetime” need the definitions and conditions in the written document.

  • Who provides each warranty, and whom would you contact?
  • Which components and installation issues are covered?
  • How long does each type of coverage last?
  • Are labor, travel, removal, and reinstallation included?
  • What exclusions, maintenance requirements, or registration steps apply?
  • Does coverage transfer if you sell the home?

Record the answers for each proposal. Do not assume two warranties provide the same protection because their headlines sound similar.

A simple replacement window quote checklist

Keep one set of notes for each contractor and use the same questions:

  • Are the same openings and optional upgrades included?
  • Can I identify the exact window and glass configuration?
  • Is the installation method explained for each opening?
  • Are finishing, cleanup, and disposal responsibilities clear?
  • Is there a written process for additional work?
  • Are the total, exclusions, payment schedule, and estimated timing clear?
  • Have I received the warranty documents?

For example, if one proposal includes exterior trim work and another excludes it, ask for comparable scopes before judging the price difference. If both describe the same work but name different glass packages, ask for the product ratings and the reason for each recommendation. These specific questions turn a confusing pair of totals into a more useful comparison.

This guide provides general planning information. The appropriate product and installation scope depend on an assessment of your home. Review the written proposal and warranty terms for your specific project.

Replacement Window Installation: A Georgia Homeowner’s Checklist

Get your home ready before the installation crew arrives

Your replacement windows are ordered, and installation day is approaching. A little preparation now can make the day easier to manage: confirm the work plan, clear access to each opening, and decide how your household will use the home while work is underway.

This checklist helps homeowners in Georgia organize those details. Use it alongside the instructions from your installer and the manufacturer of the windows you selected.

1. Confirm which windows are included

Keep the approved proposal handy and review the room-by-room window list with your installer. If several windows look alike, identify them by room and position, such as “living room, left of the fireplace.” Confirm which openings will remain untouched.

Ask these questions before rearranging the house:

  • What is the arrival window, and who is the contact for that day?
  • Which rooms need to be available, and in what order?
  • Is access needed from inside, outside, or both?
  • Who is responsible for moving large furniture and removing window coverings?
  • What trim, painting, cleanup, and old-window disposal are included?

The installation method also matters. Our guide to insert versus full-frame replacement windows explains questions to ask about the existing frame and surrounding finishes.

2. Clear indoor and outdoor access

Ask how much working clearance the crew needs around each window. Move furniture, fragile decorations, and nearby wall art as agreed. Remove curtains, blinds, or shades when that is your responsibility. Coordinate any window-alarm work with your security provider.

Outside, move planters, patio furniture, and other obstacles from the agreed work area. Discuss access around shrubs and gates before making changes. Andersen’s installation-day checklist covers these preparation steps, including protecting furnishings from dust.

Walk the route from the entry door to each room. A cleared window is not much help if a hallway is blocked by the furniture you moved. Ask the crew how floors and belongings will be protected.

3. Discuss lead-safe preparation for an older home

If your home was built before 1978, tell the installer before work begins. EPA’s guidance for homeowners explains that older homes are more likely to contain lead-based paint and that window replacement can release hazardous dust and paint chips when that paint is disturbed.

EPA recommends hiring a lead-safe certified contractor trained in appropriate work practices. Ask how the work area will be contained and cleaned, and where your household should stay during the work. Do not sand or scrape old painted surfaces as a preparation shortcut; discuss them with the contractor first.

4. Plan for people, pets, and your daily routine

Keep children and pets away from active work areas, and arrange to be available for questions. These are among the practical steps in Pella’s window installation preparation guide.

If you work from home, ask which rooms will be affected before planning calls. Set aside the items you will need during the day so you do not have to keep entering the work area. If you must leave, agree on a way to reach you and who can discuss any decisions that arise.

5. Agree on how changes will be handled

Ask for the expected project duration and how you will be notified if weather changes the plan. Also ask how openings will be protected if work pauses or continues into another day. Use the schedule given for your home rather than assuming a standard number of windows can always be completed in one day.

Existing damage may need attention during installation. The U.S. Department of Energy’s window installation job aid includes checking the opening, repairing damage, addressing flashing, and sealing the opening while following the manufacturer’s fastening specifications.

Before work starts, agree on how unexpected conditions will be documented and how proposed extra work will be presented for your approval. A useful question is: “If you find damage after removing a window, what information will I receive before deciding on the next step?”

6. Make time for the final walkthrough

Walk through the completed work with the installer while you can ask questions in person. DOE’s job aid includes verifying that the window operates properly. Ask for a demonstration of opening, closing, and locking each operable window, plus any screen or cleaning features specific to your product.

Compare the finished work with the proposal. Note any trim or finish items still outstanding and confirm who will handle them. Ask when you can clean the windows or reinstall coverings, following the applicable product instructions.

Save product identification details, care instructions, and the labels provided with your windows. Pella’s preparation guide recommends retaining product documentation and energy labels. Our guide to U-factor, SHGC, and Low-E glass can help you understand the performance information in those records.

Keep one short handover list

For each room, record the window location, any question raised during the walkthrough, the agreed next step, and the person responsible. For example: “Guest bedroom, right window: confirm cleaning instructions before reinstalling the shade.” Keep that list with the proposal so follow-up details are easy to find.

Good preparation gives you a clearer conversation before the crew arrives and a more useful walkthrough when the work is done.

This guide provides general planning information. Your home’s condition, the selected products, and the installer’s project-specific instructions determine the preparation and installation work needed.

Insert vs. Full-Frame Replacement Windows: A Georgia Homeowner’s Guide

Understand what your replacement window proposal includes

One window proposal says “insert replacement.” Another recommends “full-frame replacement.” Before comparing the totals, find out which parts of your existing windows each installer plans to remove.

For Georgia homeowners, the choice starts with the condition of each opening and the changes you want to make. This guide explains the two approaches and gives you questions to use during an assessment.

What is an insert or pocket replacement window?

An insert replacement, often called a pocket replacement, fits a new window into the existing window frame. The old sashes, which hold the glass, are removed while the surrounding frame stays in place. The exact components removed depend on the window and installation system.

Pella’s pocket installation guidance shows different methods for existing wood and aluminum frames. That is a useful reminder to ask which method applies to your home, rather than treating “replacement window” as a complete description.

Keeping a suitable frame can help preserve surrounding finishes. However, suitability needs to be checked. Andersen’s insert replacement guidance identifies a square frame without rot as important conditions for its insert products.

What is full-frame window replacement?

Full-frame replacement removes the existing window and its frame before the new unit is installed in the wall opening. It deserves consideration when the old frame is damaged, distorted, or unsuitable for the proposed replacement.

The term does not tell you exactly how much siding or trim will be disturbed. Flanged and flangeless products use different installation approaches. Andersen’s explanation of replacement installation types describes this distinction.

Ask the installer to point out what will stay, what will come out, and how the finished opening will look. If you want a larger window or a different opening shape, make that a separate part of the discussion before products are ordered.

Start with an inspection of the existing frame

A photo of the glass alone will not answer which installation method fits the opening. During the assessment, ask the installer to explain:

  • Frame condition: What evidence supports keeping or removing it?
  • Fit: Is the existing opening suitable for the proposed product and installation instructions?
  • Leak history: If you have seen water stains or damp trim, how will the source be investigated?
  • Surrounding materials: What can be assessed now, and what might remain hidden until removal?

For example, two windows in the same room may need different work if one has recurring moisture damage and the other has a sound frame. Ask for the recommendation to be recorded by opening so the proposal reflects those differences.

Ask about water management and air sealing

When discussing replacement windows in Georgia, include any observations from rainy weather: which opening gets wet, where staining appears, and whether the problem returns after a repair. Bring dated photos if you have them.

The U.S. Department of Energy’s window installation job aid includes repairing damage, replacing flashing as needed, sealing and insulating the opening, and following the manufacturer’s fastening specifications. These details deserve space in the scope of work.

Ask how the proposed installation will manage water at the opening and address air leakage. A product name or an energy rating does not describe those steps. If hidden damage is discovered, agree in advance on how it will be documented and how additional work will be approved.

Compare the finished result, not just the window count

Use the same questions for each proposal:

  • Which openings receive insert replacement, and which receive full-frame replacement?
  • What manufacturer, product line, operating style, and glass package are specified?
  • What will the visible glass dimensions and frame profiles look like?
  • Which interior and exterior trim pieces will be retained or replaced?
  • Who handles any needed painting, finish repairs, cleanup, and old-window removal?
  • What is included, what is excluded, and how are unforeseen repairs handled?

Request a product drawing or sample when appearance matters. Keep the answers beside each quote so a difference in scope does not get mistaken for a difference in the price of the same job.

For help comparing the product itself, read our guide to U-factor, SHGC, and Low-E glass. Installation scope and product performance are separate parts of the decision.

Prepare for a useful replacement window assessment

Choose three priorities before the appointment, such as preserving interior trim, changing how a window opens, or addressing a recurring leak. Then ask the installer to connect the recommended method to those priorities and the condition of the opening.

If you are still deciding whether replacement is needed, start with our Georgia homeowner’s guide to when to replace windows. You can also review MR Premium Windows’ window styles and options before discussing a specific proposal.

This guide provides general planning information. An on-site assessment and the selected manufacturer’s instructions are needed to determine the appropriate installation method for your home.

U-Factor, SHGC and Low-E: A Georgia Replacement Window Guide

Compare replacement window ratings with confidence

Two replacement windows can look similar and have different energy ratings. For homeowners in Georgia, the useful question is how each option fits the room, its sunlight, and the local climate.

Start with three terms: U-factor describes insulation, solar heat gain coefficient (SHGC) describes incoming solar heat, and Low-E describes a coating on the glass. Reading them together helps you ask more specific questions before choosing a window.

Read the NFRC label first

The National Fenestration Rating Council (NFRC) provides independently certified energy-performance ratings. Its whole-product approach lets you compare the window assembly rather than relying on a claim about the glass alone. Ask for the label or certified ratings for the exact window configuration in your proposal.

The NFRC consumer guide to window ratings explains the main measurements. A product’s name or a phrase such as “energy-efficient glass” does not give you the same comparison.

U-factor: How readily heat passes through

A lower U-factor means better insulating performance. For example, a window rated 0.25 has a lower rate of heat transfer than one rated 0.30 under the rating conditions. These numbers are an illustration, not a recommended target for every home.

Ask whether a quoted number is the certified whole-window U-factor. A center-of-glass figure leaves out other parts of the assembly and is not an equivalent comparison.

SHGC: How much solar heat gets through

Solar heat gain coefficient runs from 0 to 1. Lower values mean less solar heat enters through the window. That makes SHGC especially worth discussing for a room that becomes uncomfortable in direct sun.

U-factor and SHGC answer different questions. Two products can have the same U-factor and different SHGC values. Ask your installer to explain both numbers rather than choosing from one alone.

Visible transmittance: How much daylight enters

Visible transmittance (VT) also runs from 0 to 1, with higher values admitting more visible light. Consider it alongside SHGC if you want to manage solar heat while keeping a room bright. The NFRC label overview explains how these measurements work together.

What Low-E glass tells you

Low-E means low emissivity. A thin coating on the glass helps control heat transfer. The U.S. Department of Energy’s consumer window guide explains how coatings, multiple panes, gas fills, frames, and spacers contribute to window performance.

“Low-E” by itself does not tell you the window’s U-factor, SHGC, or daylight level. Coatings and glass configurations can produce different results. Compare the finished product’s ratings, then ask to see a sample of the proposed glass so you can discuss its appearance.

Check the climate zone for your Georgia county

ENERGY STAR certification uses NFRC ratings and climate-specific performance requirements. Use the ENERGY STAR Climate Zone Finder, selecting Georgia and your county, before comparing certified options.

Then confirm that the exact product and glass package in the proposal qualify for that location. The current ENERGY STAR product criteria are a better reference than a general claim that an entire brand is energy efficient.

Match the conversation to each room

Window direction and shade matter. ENERGY STAR’s window buying guidance highlights solar heat control for sunny exposures, including west-facing windows that receive afternoon sun.

Before an appointment, make a short room-by-room list:

  • Sunny living room: Note when direct sun reaches the seating area and whether heat, glare, or both are the concern.
  • Shaded bedroom: Record comfort problems and whether keeping natural light is a priority.
  • Kitchen or office: Note the times you use the room and any blinds you regularly close.

Bring those observations to the product discussion. They help turn a general request for “better windows” into questions about the choices that suit each opening.

Use this checklist when comparing proposals

  • Write down the manufacturer, product line, operating style, and glass package for each option.
  • Request the certified whole-window U-factor, SHGC, and VT for the proposed configuration.
  • Confirm ENERGY STAR certification for your county when comparing certified products.
  • Ask why the recommended glass package fits the room’s sunlight and your priorities.
  • Ask what the installation includes and how the crew will follow the manufacturer’s instructions.

Installation deserves its own discussion. DOE cautions that even efficient windows can leave a home drafty or develop moisture problems when installed incorrectly. Product ratings are useful comparison tools, but they do not verify the quality of a particular installation.

Plan your next step

If you are still deciding whether replacement is appropriate, start with our guide to when to replace your windows. When you are ready to compare products, explore MR Premium Windows’ window styles and options and keep the rating checklist beside each proposal.

This guide provides general product-selection information. An assessment of your home and the specific window configuration is needed to make a recommendation.