What Happens If Your Installer Finds Rot Around a Window?

A window can look fine from the curb and still have damaged wood under the trim. Sometimes the installer can see staining or soft wood during the estimate. In other cases, the damage only becomes visible after the old window comes out. If that happens, the first step is to find out what’s damaged and where the water came from.

Ask to see the damage before it’s covered

Ask the installer to show you the area and take photos. Is the damage limited to a piece of exterior trim, or does it extend into the sill, sheathing or wall framing? Those are different repairs. Stains or peeling paint can be clues, but they don’t tell you how far the damage extends.

A new window won’t fix water getting in behind it. Ask what the crew can determine about the source, such as a damaged sill or a gap in the flashing, and what will be done to direct water back outside. Pacific Northwest National Laboratory’s guide to window flashing explains why drainage around the opening matters.

Does rot rule out an insert replacement?

An insert fits inside the existing frame, so the frame needs to be in suitable condition. If deterioration affects the part of the opening that would support or seal against the new window, simply covering it isn’t a repair. A full-frame replacement may give the crew better access to assess the opening. If the damage extends into the wall or framing, additional repair work may be needed before the new window goes in. Building America window replacement checklist

Get a written scope before approving extra work

Ask for photos, a description of what will be removed and replaced, and a written price for work outside the original quote. Also ask how the opening will be protected if the repair can’t be finished that day. Once the repair is done, photos taken before the trim goes back on can help you see what was actually replaced.

If you’re still collecting quotes, ask each installer how they handle hidden damage and how they get your approval for extra work. If you’re not sure the window itself needs replacing, start with our Georgia homeowner’s guide to when to replace your windows.

Will Replacement Windows Make Your Home Darker? A Georgia Homeowner’s Guide

You can replace your windows without giving up the daylight you enjoy. The key is to compare how much glass you’ll actually see and how much light that glass lets through. Two windows that fit the same opening can look very different from inside the room.

Compare the glass you can see, not just the window size

Ask for the visible glass width and height on the exact model you’re considering. The overall size tells you whether the unit fits. The visible glass measurements tell you how much of that opening will let in light.

This matters with insert replacement, where the new unit sits inside the existing frame. Depending on the old opening and the new profile, an insert can leave less visible glass. A full-frame replacement removes the existing frame, but it doesn’t automatically give you more glass. Ask your installer to show you the difference for your specific opening.

Read the daylight number on the label

The NFRC label lists visible transmittance (VT). A higher VT means more visible light passes through the rated window. It’s not the same as the solar heat gain coefficient (SHGC), which measures how much solar heat comes through. Compare both numbers for the exact glass package rather than assuming that more daylight always means more heat. U.S. Department of Energy window ratings

If a room already feels dark, ask to see glass samples in daylight. Low-E coatings, tint and privacy glass can look different when installed than they do under showroom lighting.

Make the decision room by room

In a shaded living room, preserving visible glass may be your priority. In a west-facing room that gets strong afternoon sun, you may care more about glare and solar heat. You don’t have to choose the same glass package for every room, but it’s worth checking how different options look from the street if the windows sit side by side.

Before approving your quote, ask for three things: the visible glass dimensions, the VT and SHGC ratings for the quoted configuration, and a sample you can look through in daylight. That gives you a better basis for deciding than the words “energy-efficient” alone.

Still deciding whether the existing windows need replacing? Start with our Georgia homeowner’s guide to when to replace your windows.

Drafty Windows in Winter: A Georgia Homeowner’s Guide to Fixing or Replacing Them

Find the draft before you fix it

Georgia winters are mild compared with much of the country, but a cold snap still brings freezing nights to Metro Atlanta and North Georgia. That is usually when homeowners notice drafty windows: a chilly spot by the couch, curtains that move on their own, or a heating system that seems to run all evening.

A draft does not always mean a window has to be replaced. Sometimes a lock, a strip of worn weatherstripping, or a gap in the exterior caulk is the real problem. This guide walks you through how to find window air leaks, which quick fixes are worth trying this season, and the signs that replacement makes more sense than another patch.

Signs your windows are letting cold air in

Look for these clues on a cold or windy day:

  • You feel moving air when you hold your hand near the sash, the frame, or the trim.
  • Curtains or blinds sway slightly even though the window is closed.
  • You hear whistling, or the sash rattles when the wind picks up.
  • The window will not lock easily, or the sashes do not meet tightly in the middle.
  • You can see daylight around the edges of the sash from inside.
  • Rooms with the most windows stay noticeably colder than the rest of the house.
  • Fog or moisture shows up between the glass panes, which points to a failed seal.

One clue on its own is not a verdict. Several clues on the same window usually mean it is worth a closer look.

How to check your windows for drafts at home

You do not need special tools for a first check. Pick a cool, breezy day, turn off ceiling fans, and go window by window. The U.S. Department of Energy’s do-it-yourself home energy assessment guide covers the same idea for the whole house.

1. Use your hand and a strip of tissue

Move the back of your hand slowly along the edges of each sash, where the sashes meet, and where the frame meets the wall. Then hold a thin strip of tissue paper in the same spots. If it flutters, you have found moving air.

2. Try the flashlight test at night

After dark, have one person shine a flashlight around the outside edges of the window while another watches from inside with the lights off. Light coming through the gaps shows you exactly where air can get through.

3. Check the locks and the sash fit

On a double-hung window, the lock does more than keep the window shut. It pulls the two sashes together against the weatherstripping. If a window only seals well when it is locked, keep it locked all winter. If it will not lock, or still rattles when locked, the sash or balance may be worn.

4. Look at the outside trim and caulk

Walk around the house and look where the window frame meets the siding or brick. Cracked, shrunken, or missing caulk lets air and water in. Soft or crumbling wood on the sill or trim is a bigger warning sign, because it usually means moisture has been getting in for a while.

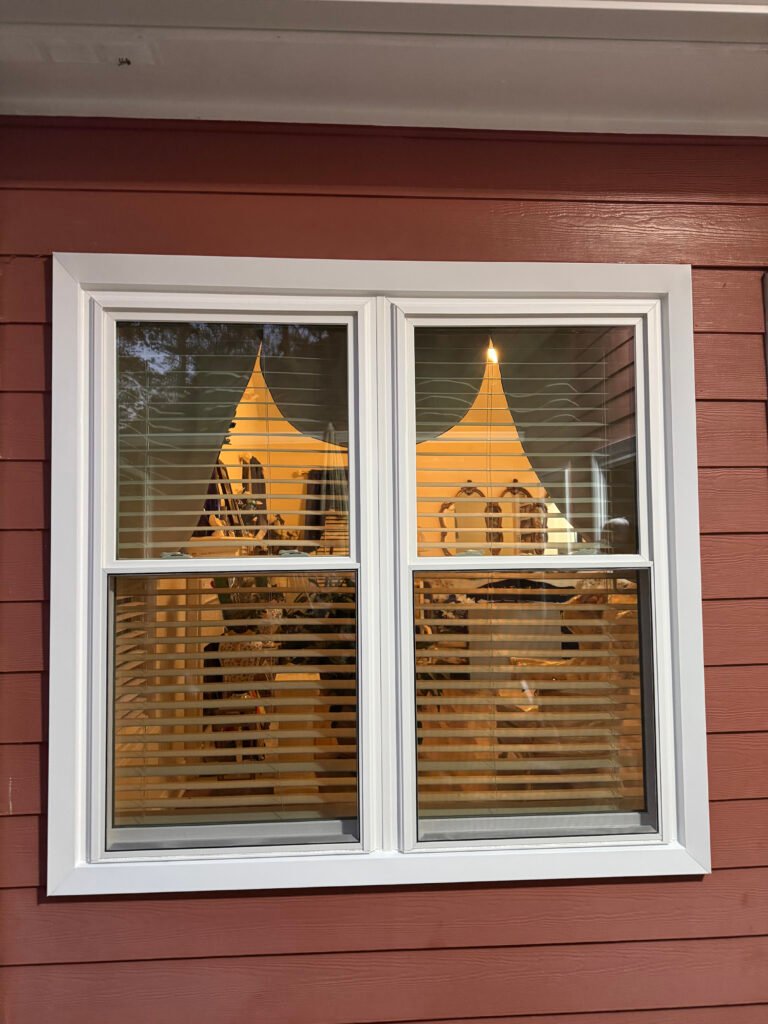
New white double-hung replacement windows installed in a red siding wall of a Georgia home

Quick fixes for drafty windows this season

If the frames are solid and the glass is in good shape, these steps can cut down drafts for the winter:

  • Lock every window. It is free and often makes a real difference on double-hung windows.
  • Replace worn weatherstripping. Flattened, torn, or missing strips around the sash are a common source of drafts.
  • Re-caulk exterior gaps. Seal cracks between the window trim and the siding or brick. Check the temperature range on the caulk label, since many products need a dry, mild day to cure properly.
  • Use a temporary seal on windows you never open. Removable rope caulk or a clear plastic window insulation kit can get you through the cold months.
  • Close curtains at night. Heavier curtains add a layer between the glass and the room after the sun goes down.

Quick fixes are worth doing, but they are patches. If you are repeating the same fixes every winter, the window itself is probably the problem.

When replacement makes more sense than another patch

Replacement is usually the better long-term choice when you see one or more of these:

  • Single-pane glass. One layer of glass does very little to slow heat loss, no matter how well the frame is sealed.
  • Rotted or soft frames and sills. Caulk will not hold on damaged wood, and the damage tends to spread.
  • Sashes that stick, drop, or will not lock. Worn balances and warped sashes keep the window from closing tightly.
  • Fog between the panes. A failed seal in an insulated glass unit lets the gas fill escape. Our guide to window condensation and when to repair or replace explains the difference between surface moisture and a failed seal.
  • Drafts in many rooms at once. When most of the windows in the house are drafty, fixing them one by one gets expensive and slow.

For a fuller checklist, read when to replace your windows.

What to look for in an energy-efficient replacement window

A new window only fixes a draft if it is built and installed to seal well. When you compare options, ask about:

  • Low-E glass, a thin coating that reflects heat back toward its source.
  • Gas-filled insulated glass, such as argon between the panes, to slow heat transfer.
  • Weatherstripping and frame construction, including multi-fin weatherstripping and fusion-welded corners.
  • Performance ratings on the label. Our guide to U-factor, SHGC, and Low-E ratings shows how to read them.
  • Double or triple pane. See double-pane vs. triple-pane windows for Georgia homes.

Installation matters as much as the product. If the existing frame is rotted, an insert window may not solve the draft, and a full-frame replacement may be needed. Our article on insert vs. full-frame replacement windows explains the difference. You can also see the window styles, glass packages, and features we offer on our replacement windows page.

Can you replace windows in winter in Georgia?

Yes, window replacement can be done in the cooler months. Windows are usually replaced one opening at a time, so each room is only open for a short time. If you are planning a winter project, ask your installer how they protect your floors and furniture, how long each opening stays open, and how the work is scheduled around the weather.

If replacing every window at once is not in the plan, start with the draftiest rooms. Our guide to replacing windows in stages shows how to plan it, and our installation preparation checklist helps you get ready for installation day.

Get a free window estimate before the next cold snap

Mr Premium Windows is based in Marietta and helps homeowners in Marietta, Kennesaw, Smyrna, Roswell, Alpharetta, Woodstock, and communities across Georgia. We can look at your drafty windows, help you decide whether simple fixes or new windows make more sense, and give you a clear quote.

Call (470) 470-4617 or request your free estimate online. Ask us about flexible financing terms, based on credit approval.

This guide provides general information for homeowners. The right fix depends on the condition of your windows and home. Follow the manufacturer’s instructions for any sealing product you use.

Replacement Window Screens: A Georgia Homeowner’s Buying Checklist

Include screens in the window conversation

When comparing replacement windows, glass and frame choices usually get the attention. Screens deserve a place on the checklist too, especially if you enjoy opening your windows when the weather is comfortable.

For homeowners in Georgia, the useful question is not simply whether a window has a screen. Ask which screen is included, what opening it covers, and how you will use and maintain it. Confirm those details before the order is finalized.

1. Confirm what is included for each window

Do not assume the proposal includes a screen for every operable window. Have the supplier list the screen type and quantity alongside the window schedule, including any optional upgrades.

Ask whether the quoted screen is removable, fixed in its normal operating position, or retractable. If a retractable option is offered, have someone demonstrate how it engages and stores. Availability depends on the exact window product, not just the brand name.

For example, Pella’s screen guide describes flat and retractable options and explains that screen configuration varies by window type. Use the guide to understand the choices, then verify what is available for your own proposal.

2. Match coverage to the way you open the window

A half screen and a full screen do not cover the same area. Ask which sash positions the proposed screen accommodates. If you expect to open either sash of a double-hung window, have the supplier demonstrate how screening works in each position.

Screen placement also matters. Pella’s guide describes interior screens for outward-opening casement and awning windows, while other operating styles commonly place screens outside. Check the arrangement on the actual product rather than assuming it matches your current windows.

Our window style comparison can help you connect the screen discussion to the way each room will be used.

3. Check fit, appearance, and everyday handling

If you hope to reuse an existing screen, ask for a compatibility check. Similar window dimensions alone are not enough to confirm that its frame and attachment points will fit the new assembly.

Where samples are available, look through the screen from a normal seated position. Compare the appearance of any alternatives under similar lighting. Ask for documentation behind claims about visibility, airflow, or specialty mesh rather than assuming every upgrade provides the same benefit.

Try the removal and reinstallation process with guidance. Can you reach the tabs or latches comfortably? Where will the screen go while you clean the glass? If the operation feels awkward, discuss it before making the final choice.

4. Keep insect control separate from fall protection

An ordinary insect screen is not a safety barrier. The U.S. Consumer Product Safety Commission warns against relying on screens to prevent children from falling and recommends keeping furniture away from windows.

If children live in or visit the home, discuss appropriate window guards or opening-control devices with a qualified professional. Safety measures must also account for emergency escape. Do not treat a sturdier-looking mesh or screen frame as evidence of fall protection.

5. Plan for care and future replacement

Keep the screen identification and care instructions with your window records. Ask how to obtain a replacement if the mesh, frame, or attachment hardware is damaged.

Andersen’s cleaning guidance uses mild soapy water, a soft-bristle brush, and a clean-water rinse for its insect screens. Follow the instructions for your own product rather than assuming one cleaning method suits every design.

For the rest of the assembly, use our replacement window care checklist.

Add these details to the quote

  • Screen type and quantity for each operable window
  • Included features versus separately priced options
  • Coverage for the sash positions you intend to use
  • Removal, cleaning, and reinstallation instructions
  • Replacement-part identification and applicable coverage

Add this list to your replacement window quote checklist. A screen may be a small part of the project, but choosing it deliberately helps make the finished window easier to live with.

This guide provides general product-selection information. Screen availability, compatibility, care, and safety requirements must be confirmed for the specific window and home.

Bay vs. Bow Replacement Windows: A Georgia Homeowner’s Guide

Choose the shape and the complete installation plan

Bay and bow windows both project beyond an exterior wall, but their shapes and layouts differ. Choosing between them involves more than the view from the street: consider how the room works, which windows open, and what the installation requires.

For homeowners in Georgia, start by deciding whether you are replacing an existing projecting assembly or considering a new one. Those are different conversations, even when the inspiration photos look similar.

1. Compare the basic shapes

Marvin’s bay and bow guide describes a typical bay as a larger center window with two narrower side windows angled outward. A bow usually has four or more similarly sized windows arranged in a gentler curve.

These are common configurations, not a promise that every product follows the same pattern. Request a drawing of the proposed assembly with dimensions, frame divisions, and opening sections marked.

Compare that drawing with your furniture layout and exterior. The number of divisions may matter as much as the overall shape when you are looking through the window every day.

2. Define what is being replaced

Ask the installer to assess the existing assembly, surrounding materials, and any signs of water damage. Clarify what stays and what will be removed. Reusing an existing projection should follow an assessment, not an assumption that everything behind the trim is sound.

Converting a flat window into a projecting assembly can involve a different scope. Pella’s bay replacement guide identifies structural adjustments and support as installation considerations. Ask what your particular opening requires before comparing prices.

Our insert versus full-frame replacement guide explains why the retained and removed components need to be clear in any proposal.

3. Decide which sections should open

Do not assume every section opens. Have the supplier identify fixed and operable units, screens, handles, and the direction of operation.

Picture yourself reaching the controls around a sofa, table, or deep interior ledge. Ask how you will clean each pane safely and whether exterior access is needed. Never plan routine maintenance around standing on an interior ledge that was not designed for that use.

If you want a window seat, discuss it explicitly. A projecting window and a usable seat are not automatically the same installation.

4. Include support and weather protection

Ask the professional to explain how the assembly will be supported and how its top, sides, and bottom will connect to the home’s weather protection. Have the proposal identify roofing, flashing, insulation, trim, and finishing work where applicable.

Pella emphasizes correct sealing and structural support. The appropriate details depend on the selected product and the existing building. This is a reason to follow the manufacturer’s instructions and obtain a qualified assessment, not to copy a support detail from an unrelated project.

5. Compare glass and the full project scope

A larger view does not tell you how the selected glass will handle light and heat. The NFRC window ratings guide distinguishes visible transmittance, solar heat gain coefficient, and U-factor. Compare the ratings for the quoted configuration and discuss your room’s sun exposure.

Before choosing, make sure each quote identifies:

  • The assembly size, projection, window styles, and glass package
  • Assessment and any required structural work
  • Support, weather protection, insulation, and finishes
  • Removal, disposal, and responsibility for hidden damage
  • Applicable product and installation warranty documents

Use the replacement window quote checklist to compare equivalent work. The better choice is the layout that suits your room with an installation scope you understand, not simply the most dramatic photo.

This guide offers general planning information. Product availability, structural suitability, installation requirements, and any necessary approvals must be confirmed for your home.

Replacement Window Warranties: A Georgia Homeowner’s Guide

Compare the coverage, not just the headline

A replacement window warranty is useful only when you understand what it covers and how to use it. A long coverage period does not automatically mean every component, service visit, or installation expense is included.

For homeowners in Georgia comparing proposals, the practical goal is a written record of who handles a problem, what remedy is available, and which costs may remain yours. Start with the exact products in the quote rather than a general promise about the brand.

1. Collect the documents before choosing

Request the manufacturer’s warranty for the quoted product line and any separate written installation coverage. Check the effective date and match the document to your order. A brochure headline is not the complete agreement.

The FTC’s consumer warranty guide recommends reviewing coverage before purchase and getting spoken promises in writing. If someone describes free service, ask where that commitment appears and which company provides it.

2. Read component periods and “lifetime” terms

Make separate notes for glass, frames, hardware, finishes, and labor. Do not assume one advertised period applies to everything. Ask when each period starts and whether coverage changes over time.

The FTC’s warranty guidance explains why “lifetime” needs a defined meaning. For a specific window, read whose ownership or which product life controls the term.

For example, Pella’s warranty FAQ limits lifetime coverage, where included, to the original purchaser in an owner-occupied single-family residence, subject to the written terms. This is a manufacturer example, not a statement about every window warranty.

3. Separate replacement parts from service costs

A covered component and a no-cost repair are different questions. Ask the supplier to explain the complete process for a hypothetical failed glass unit:

  • Who determines whether the problem qualifies?
  • Who supplies the replacement component?
  • Who pays for inspection, delivery, removal, and installation?
  • Are trim repairs, finishing, or disposal included?

Pella’s FAQ also notes that component coverage and service-labor periods can differ. Use the applicable document to confirm the actual periods, rather than applying another product’s terms to your proposal.

4. Review exclusions and planned modifications

Read the installation, maintenance, and alteration conditions before adding accessories or changing finishes. Ask about any window film you intend to use.

Pella’s FAQ says a defect caused or contributed to by tinting or modifications would not be covered. That is not the same as saying every modification cancels all coverage. Get product-specific guidance before proceeding, and keep the manufacturer’s care instructions with your records.

5. Check transfer and claim requirements

If you might sell or rent the home, ask whether ownership or occupancy changes affect coverage. Confirm any transfer deadline, registration step, fee, and remaining term in writing. Do not assume “transferable” means the next owner receives identical coverage.

Keep the invoice, product identifiers, warranty version, installation date, and correspondence together. Photograph labels before they become difficult to access. The FTC recommends retaining the warranty and receipt; your supplier should explain the specific claim contact and documentation required.

Compare two real proposals side by side

Imagine two quotes advertising long glass coverage. One clearly explains service labor; the other does not. The missing information deserves a written answer before either proposal can be compared fairly.

Add these details to your replacement window quote checklist. Choose with the actual documents in front of you, not the largest number in the headline.

This guide provides general purchasing information, not legal advice or a statement of Mr Premium Windows’ warranty terms. Coverage depends on the applicable written agreements and product circumstances.

Will Your Blinds Fit After Window Replacement? A Georgia Homeowner’s Guide

Plan for your window treatments before installation day

Replacing a window does not automatically mean replacing every blind or shade. It also does not guarantee that the existing treatment will fit. For homeowners in Georgia, the best approach is to make window coverings part of the project discussion before the window order is finalized.

Show the installer which blinds, shades, shutters, or curtain rods you hope to keep. Ask for a compatibility check rather than relying on the fact that the opening looks the same from across the room.

1. Identify how each treatment is mounted

Inside-mounted treatments sit within the window casing; outside-mounted treatments attach outside that opening, such as to the wall or trim. The mounting location helps determine which dimensions need checking. Photograph the existing brackets and label each treatment by room.

Do not assume that two similar-looking windows use identical blinds. Keep a separate record for each opening, including the treatment type, manufacturer if known, and anything that already catches or rubs.

2. Check depth, not just width

A blind may be the right width but lack enough room for its headrail or moving parts. Bali’s measuring guidance distinguishes minimum mounting depth from a fully recessed fit and notes that handles and cranks can interfere with inside-mounted treatments.

Have the installer and window-treatment specialist compare the proposed finished opening, hardware clearance, and bracket position. Ask whether the existing mounting surface will remain. Do not drill into a new window frame without confirming the window manufacturer’s instructions and the appropriate mounting location.

3. Clarify what the replacement changes

Ask which parts of the existing frame and interior trim will remain and which will be replaced. Our insert versus full-frame replacement guide explains why the installation scope matters.

Make the question specific: “Will this treatment fit and operate after the new window and trim are complete?” A drawing or sample can help, but the final check should reflect the actual installation. If new blinds are needed, agree with the supplier on when final measurements should be taken rather than ordering from the old opening alone.

4. Test everyday use

After reinstallation, check the window and treatment together. Raise and lower the shade, adjust the slats, and operate the window locks and handles. Confirm that normal cleaning access remains available and that the treatment does not prevent the window from opening as intended.

For new treatments, use the exact product’s manufacturer measuring instructions. Do not apply a universal size deduction: ordering conventions and clearance requirements differ by product.

5. Include safety and responsibilities

If young children live in or visit the home, review the coverings as well as their fit. The U.S. Consumer Product Safety Commission recommends cordless window coverings as the safest option when young children are present because accessible cords can pose a strangulation hazard.

Before installation day, put these responsibilities in writing:

  • Who removes, labels, and stores the existing treatments?
  • Who reinstalls them and checks their operation?
  • Does the quote include bracket relocation or trim touch-ups?
  • Who confirms compatibility if a treatment cannot be reused?

Add this list to your window installation preparation checklist. A short conversation before the work begins can prevent an avoidable surprise when it is time to put the room back together.

This guide provides general planning information. Fit, mounting methods, and product suitability must be confirmed for the specific window and window treatment.

Double-Pane vs. Triple-Pane Replacement Windows for Georgia Homes

Decide what a third pane would add to your project

You are comparing replacement windows, and one proposal offers double-pane glass while another recommends triple-pane. Before choosing the upgrade, ask what changes in the complete window and whether those changes address the rooms you want to improve.

For homeowners in Georgia, the useful comparison includes insulation, solar heat, daylight, operation, and the actual installed price. A third pane can improve thermal performance, but pane count alone does not tell you which proposal fits your home.

1. Understand what double-pane and triple-pane mean

A double-pane insulated glass unit has two layers of glass with a space between them. A triple-pane unit has three layers and two spaces. These terms describe the glass construction, not how many sections of the window open.

The NFRC guide to window components explains that coatings, gas fills, spacers, and frames also influence energy performance. Ask for the complete glass-package description rather than comparing only the number of panes.

For example, “double-hung” describes a window with two sliding sashes; it does not mean “double-pane.” Keep the operating style and glass specification on separate lines when reviewing your choices.

2. Compare whole-window ratings side by side

Ask for the certified ratings for each proposed configuration. The NFRC window ratings guide describes a whole-product approach, so you can compare the assembly rather than a glass-only claim.

  • U-factor: Lower values mean less heat transfer. This is the first number to compare when evaluating an insulation upgrade.
  • Solar heat gain coefficient (SHGC): Lower values admit less solar heat. Check it separately from U-factor.
  • Visible transmittance (VT): Higher values admit more visible light. Include it if keeping the room bright matters.

If one proposal has a lower U-factor, do not assume its SHGC and daylight performance are identical to the other. Our replacement window ratings guide explains these terms in more detail.

3. Does a Georgia home need triple-pane windows?

The state name alone is not enough to make that recommendation. Start with the ENERGY STAR Climate Zone Finder, selecting Georgia and your county. Confirm that the exact product being considered is certified for that location.

Then describe the problem by room. Is the seating area uncomfortable beside the glass on cold evenings? Does afternoon sun make a room too warm? Is the room already darker than you would like? Those are different priorities, and the proposed ratings should help explain the recommendation.

ENERGY STAR’s buying guidance considers both climate and window orientation. Use that approach instead of assuming every opening needs the same glass package. Ask the supplier to explain the specific benefit of each option for the rooms you identified.

4. Check fit and everyday operation

Do not assume all triple-pane products have the same thickness or weight. The U.S. Department of Energy’s explanation of thin triple-pane windows describes designs using a thin center pane to create the additional insulating space.

Ask which construction is being quoted and whether it is available in the sizes and operating styles you need. Have the installer confirm the fit and installation requirements for your existing openings.

Try a sample of the proposed window where available. Check that you can comfortably use the locks and operating hardware, and ask how the cleaning features work. If the glass choice requires a different product line, compare the frame profile and visible glass area as well.

5. Treat outside noise as a separate comparison

If traffic noise is the main concern, do not select an extra pane without acoustic information. Andersen’s sound-abatement guidance explains that glass thickness, spacing, and construction affect sound performance; moving from two panes to three is not automatically the best noise-control choice.

Request acoustic ratings for the exact options and discuss the noise source with the supplier. Our guide to replacement windows and outside noise covers the questions to ask without treating a thermal rating as evidence of a quieter room.

6. Ask for a clearly priced alternative

Have the supplier price the double-pane and triple-pane options against the same window list and installation scope. If the manufacturer, frame, finish, or operating style also changes, have those differences identified. Otherwise, the price difference cannot be attributed to the glass alone.

Ask for the estimated lead time and written product specifications for both options. If energy savings are part of the recommendation, request the assumptions behind any estimate, including your existing windows and home conditions. A window’s rating is not a guarantee of a particular reduction in your household bill.

Installation still matters. ENERGY STAR warns that even efficient windows can be drafty when installed poorly. Keep the air-sealing and installation scope in the comparison, whichever glass package you choose.

Make the upgrade decision specific

Before approving the order, complete this short comparison for each alternative:

  • Exact product, operating style, and glass package
  • Whole-window U-factor, SHGC, and VT
  • Certification for your county
  • Relevant acoustic data if noise is a priority
  • Fit, appearance, and operation details
  • Installed price, included work, and estimated timing

Then finish one sentence: “We are choosing this option because it addresses ___, and the documented difference is ___.” If the answer is only “it has more panes,” ask for a clearer explanation before deciding.

Use our replacement window quote checklist to review the rest of the scope. The goal is a glass package whose benefits you understand, paired with a suitable window and installation plan.

This guide provides general product-selection information. Availability, suitability, performance, and installation requirements must be confirmed for your home and the exact window configuration.

Can Replacement Windows Reduce Furniture Fading? A Georgia Guide

Understand UV protection before choosing the glass

Replacement windows with suitable glass coatings can reduce ultraviolet exposure and help limit fading of furnishings. They cannot guarantee that furniture, flooring, or artwork will never change color. The result depends on the selected glass and what you are trying to protect.

If a sunny spot on the sofa or a discolored area of flooring has prompted your window search, bring that concern to the assessment. For Georgia homeowners, a useful comparison connects the glass specification to the room’s sunlight, your daylight preferences, and realistic expectations.

Understand why UV protection is only part of the answer

Ultraviolet radiation and visible light can both damage sensitive materials. Reducing UV addresses part of the exposure, but visible light still reaches the room, and some dyes and finishes remain vulnerable.

Replacing the windows will not reverse fading that has already occurred. Think of the project as an opportunity to reduce future exposure while addressing other window problems.

Ask what the UV claim actually measures

Request the manufacturer’s information for the exact glass package in your proposal. If a supplier gives you a UV-blocking percentage, ask which glass configuration it describes, what wavelength range and test method were used, and whether the same specification is available in the styles and sizes you need. Keep the supporting document with the quote.

Compare daylight and comfort separately

You may want less exposure to damaging radiation while keeping the room bright and comfortable. Ask the supplier to address those goals separately:

  • Visible transmittance (VT) describes how much visible light passes through.
  • Solar heat gain coefficient (SHGC) describes how much solar heat enters.
  • U-factor describes insulating performance.

These measurements answer different questions. An energy rating is not a substitute for documentation of a UV-protection claim. Ask to see a sample of the proposed glass and compare the certified ratings for the quoted configuration.

Make the discussion specific to your room

Identify the furniture, flooring, or artwork you want to protect. Note which window faces it, when direct sun reaches it, how long the sunny patch remains, and whether heat, glare, or daylight are also concerns. Photos can help you discuss the problem, although they do not establish the cause of fading.

For valuable or irreplaceable items, seek item-specific conservation advice. A glass upgrade should not be treated as a reason to leave sensitive objects in prolonged direct sunlight.

Check compatibility before adding window film

If you are considering aftermarket film, ask the window manufacturer about the exact film and glass combination and read the applicable warranty. Compatibility and warranty conditions vary by product, so do not assume that a film suitable for one window is suitable for another.

Compare the proposal with your goal

Before choosing, make sure you know the exact window and glass package, the evidence supporting its UV claim, how it affects daylight and comfort, and what protection sensitive belongings will still need.

A well-supported choice can reduce exposure and improve the room without promising that every furnishing will remain unchanged.

Sources and further reading

Replacing Windows in Stages: How to Plan a Georgia Home Upgrade

Choose the first phase without losing sight of the whole home

You want replacement windows, but you are not ready to tackle every room at once. Can you start with a few openings? A phased project may be worth discussing, provided the windows left in place are assessed and the first order fits a longer-term plan.

For Georgia homeowners, the useful question is which work needs attention now, which improvements matter most, and what can reasonably wait. This guide helps you build that plan without assuming that every window needs replacement or that a larger order is automatically the better deal.

1. Assess the whole house before choosing the first windows

Start with one list of all openings, even if you expect to replace only a few. Label them by room and position. Record visible damage, water after rain, operating problems, and comfort concerns separately from appearance preferences.

The NFRC guide to repairing existing windows explains that some faulty components can be repaired, while water entering around a frame can damage surrounding wall materials. Ask the professional to identify the problem before assigning a window to a later phase.

Use three planning groups:

  • Needs prompt assessment: Active leaks, damaged glass, deteriorated materials, or a window that will not operate or secure properly. Do not treat an unresolved problem as safe to postpone.
  • Candidate for the first replacement phase: Openings assessed as needing replacement that also address your main practical priorities.
  • Keep and review: Windows the professional considers suitable to retain, with any recommended repair, maintenance, or reassessment noted.

These are discussion groups, not a diagnosis. Our guide to when to replace your windows can help you prepare observations for the assessment.

2. Give the first phase a specific goal

After urgent concerns are assessed, decide what a first phase should accomplish. Replacing the windows in a frequently used room may fit your priorities better than selecting an arbitrary number around the house.

Describe the result you want in everyday terms: easier operation in the kitchen, a more comfortable seating area, or a consistent appearance across the front of the home. Ask which openings and product choices actually support that goal.

For comfort concerns, note when the problem occurs and whether the room gets direct sun. ENERGY STAR’s buying guidance considers climate and window orientation, so grouping windows by room does not mean every opening needs an identical glass package. Confirm the proposed products for your Georgia location.

Do not use a whole-house energy-savings claim to predict the effect of replacing two or three windows. Ask what improvement can reasonably be discussed for the selected rooms and what remains uncertain.

3. Plan the appearance of old and new windows together

Take photos from inside each affected room and from the street. Compare the windows being replaced with the ones staying in place. Look at frame width, glass appearance, exterior color, grille pattern, and the height of horizontal lines.

If matching a front elevation is important, ask for a drawing that shows the complete arrangement. A phase organized around the front of the house may make more visual sense than replacing one window in each room, provided the condition assessment supports that sequence.

Keep a specification record for future work:

  • Manufacturer, product line, and operating style
  • Interior and exterior finish names and codes
  • Glass package and performance ratings
  • Grille pattern, bar profile, and hardware finish
  • Approved drawings, product labels, and installation records

Ask whether matching products and options are expected to remain available, but do not treat future availability as guaranteed. Before ordering a later phase, compare current samples and specifications again. Our window grille guide explains the decorative details worth recording.

4. Compare a phased proposal with one combined project

Ask for two clearly labeled scopes: the proposed first phase and the full set of replacements currently recommended. If later phases are estimated, have the supplier distinguish those estimates from prices that are actually committed.

Andersen’s replacement window FAQ notes that volume discounts may be available and are determined by the retailer or dealer. That is a reason to ask about the actual proposal, not evidence that your project qualifies for a discount.

Ask whether separate visits change delivery, setup, disposal, trim, or finishing charges. Compare the same product specifications and installation work in both approaches. Also check how long each price is valid and whether there is a minimum project size.

Keep the decision within the amount you are comfortable committing now. A useful comparison shows the first-phase total, the combined-project total, and any unknown future costs without assuming prices will stay unchanged. Use our replacement window quote checklist to review the underlying scope.

5. Make each phase a complete installation

Ask how each selected opening will be fully installed, sealed, finished, and checked before that phase ends. Splitting the project should not leave unfinished weather protection waiting for a future order.

If windows share a larger assembly, or you also plan siding or trim work, ask the installer whether the proposed sequence is practical. Have them identify any work that should be coordinated rather than assuming every section can be handled independently.

ENERGY STAR emphasizes following the selected manufacturer’s installation instructions. Keep those requirements in every phase, along with a clear process for documenting hidden damage and approving additional work.

Plan household access separately for each visit. Our installation preparation checklist covers room access, belongings, and the final walkthrough.

Write a short plan for what happens next

Imagine a home with a leaking rear window, several front windows the owner wants to match, and a guest-room window that still works well. Start by investigating the leak. Then compare a first phase focused on the necessary repair or replacement with a larger phase that also addresses the front appearance. The guest-room window belongs in the assessment, not automatically on the replacement order.

For each opening, record four items: the assessment, the proposed action, the reason for its priority, and what would trigger a review. Ask the professional what changes to watch for in windows staying in place and when to reassess them.

The result should be a first phase you can explain, a record that helps future windows match, and a clear plan for the openings you are keeping. That gives you a practical next step without committing to an undefined whole-house project.

This guide provides general project-planning information. An on-site assessment is needed to determine repair options, replacement priorities, suitable products, and whether a phased installation is appropriate for your home.